
Even before 2020, I was already spending a lot of time on Zoom. Being a virtual consultant from New Zealand where 95% of my clients are overseas, it’s an app that gets a lot of usage from me.
Then 2020 happened and everyone started working remotely and using Zoom to host family get-togethers, gym classes or to catch up with friends while on lockdown.
According to Timing, I’ve spent 266 hours on Zoom this year. And I’m pretty sure this is under-reporting as it only counts active time (i.e. if I’m screen sharing, it’s Timing counts the active app).
Needless to say, I’ve learned a thing or two about hosting video calls on Zoom. And in this post, I’d like to share some of the tips I’ve picked up along the way so you can host better calls.
Don’t want to read this post? Listen to the podcast instead:
“Dave, click the save button. Down… No down… Further… Back, that’s too far…”. Here are 8 tips for better Zoom calls!Click To Tweet1. Invest in your audio first
Your Zoom experience will get exponentially better when you invest in a good quality mic and (or) headphones. Especially if you’re not the only person in the room.
And if you’re going to spend money on any gear, I’d recommend upgrading your audio before investing in a better camera or lighting.
There are some great USB mics out there. While I haven’t tried it, I hear good things about the Blue Snowball (affiliate link).
Personally, I use the Bose QuietComfort 35’s (affiliate link). They’re extremely comfortable and can be worn for hours on end. They have very excellent noise cancellation and the built-in mic is pretty good.
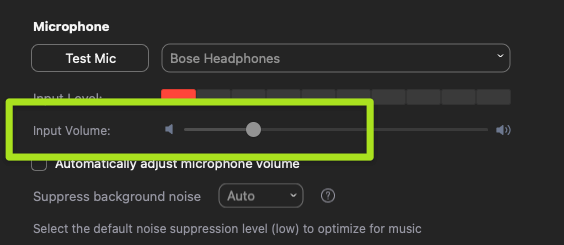
You may need to adjust the audio input level on Zoom to ensure it doesn't pick up too much background noise:
2. Invest in a camera second
Once you’ve sorted out your audio, if you want to improve call quality and appear more professional, a good camera goes a long way.
The built-in camera on most laptops or tablets is pretty basic. Obviously, it’s great on the go, but if you have a more permanent set up, I’d recommend the Logitech C922 HD webcam. I currently have an older version and it does a great job.
I’ve even seen some people get fancy and connect external cameras or DSLR’s to their computer. But for casual calling, the Logitech HD webcam is a great option.
3. Simple lighting goes a long way
It also helps to give some thought to lighting. Natural light is best, so if you can sit near a window that’s ideal. My home office desk faces a window and I can use the blinds to control the light to a degree. Even if you choose not to upgrade your video, lighting can really help a lot.
However, if you’re calling at night or don’t have great natural light options, then a few well-placed lamps or a simple LED ring light really helps. I purchased this one on Amazon for $20 for recording my YouTube videos. I particularly like how you can toggle between warm and cool light options.
4. Mute upon entry (participants to unmute as needed)
Okay, getting into some practical calling tips…
If you’re hosting the Zoom call, it can be useful to mute participants upon on entry. Especially if it’s going to be a big call with lots of people. This can be done in your Zoom settings under the ‘Schedule Meeting’ options.

Most people are getting pretty good at learning to unmute themselves when they want to speak and doing this helps to keep the background noise to a minimum.
5. Use chat for unobtrusive feedback
With everyone muted, it’s worth drawing people’s attention to the chat window. So as you’re talking or presenting, they can contribute with questions or comments via the chat.
For the type of training calls I do where there are lots of people, I’ve found this to be particularly useful.
But even for non-training calls, it creates a really interesting dynamic where people are able to contribute or provide feedback via the chat without interrupting the conversation. This isn’t an option in the real world (unless you hold up a note on a piece of paper).
6. Connect with your scheduling tool
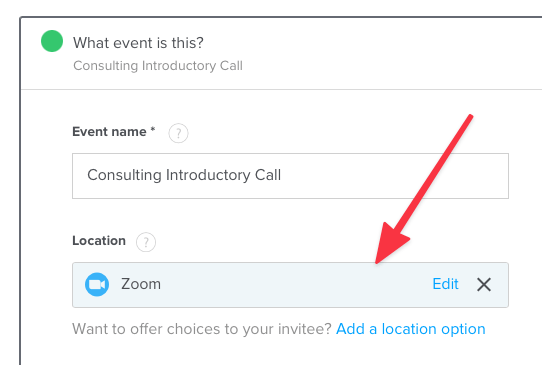
If you use a scheduling tool like Calendly for booking meetings, you can connect your account to Zoom so that when the confirmation email and calendar invite is sent, it includes the Zoom details along with the meeting password. This makes it really easy for attendees to join the call with a simple click from their calendar so they don’t have to go hunting through emails for the URL.
This is done inside your scheduling tool:
7. Turn on do not disturb
There’s nothing worse than being on a video call when you're sharing your screen and an embarrassing notification appears on your computer.
If your device has a do not disturb option, make sure you turn this on before your meeting.
I’ve managed to automate this use Keyboard Maestro on the Mac. So when the Zoom app launches, this triggers Keyboard Maestro to enable do not disturb on my computer. And when the call ends and I close Zoom, KM can disable do not disturb and notifications will resume.
8. Don't forget about the whiteboard and annotation features
An often underused feature of Zoom is the whiteboard.
When you click to share a screen, you can choose to share a particular window or display. Or you can choose to share a whiteboard with all participants. This is really useful for sketching out ideas or concepts.
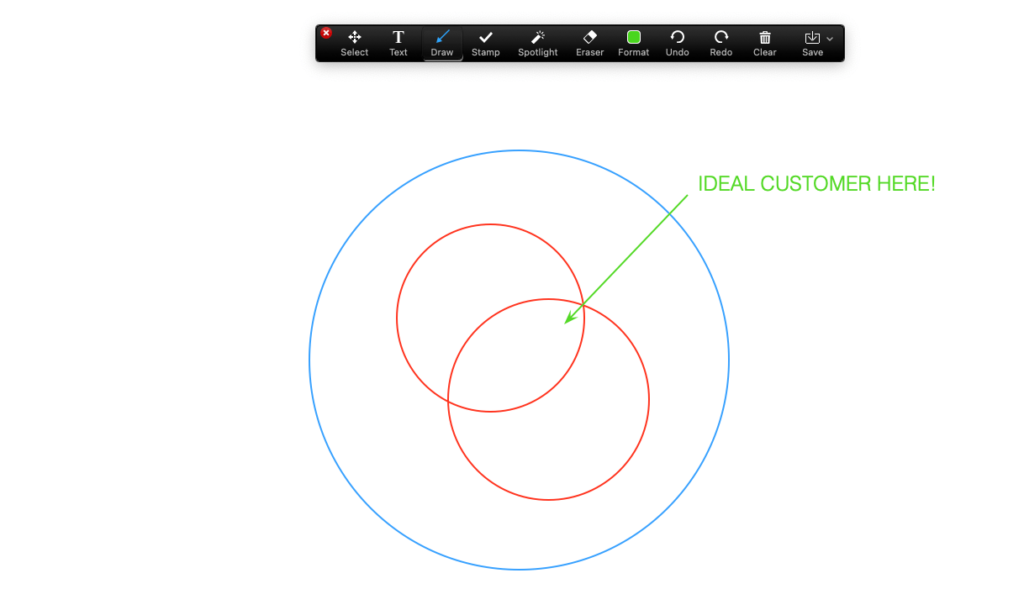
You can also use the annotation features to draw on the screen while you or someone else is sharing.
So instead of saying:
“Dave, click the save button. Down… No down… Further… Back, that’s too far…”
You can use the annotation options to draw on the screen being shared.
—
What tips have you picked up while using Zoom (or other video conference calling tools) this year?