On a recent episode of Mac Power Users, hosts David and Katie talked through the in’s and outs of using Hazel to automatically organise and sort your documents.
For me, Hazel is one of those apps I’ve heard a lot about but have never really spent the time to learn. In a Nutshell, Hazel helps to keep your Mac clean by watching specific folders and then performing actions on files that meet certain criteria. For example, now I’m using Hazel to automatically rename and move receipts and invoices to a specific Dropbox folder ready for my doing my accounts.
One of the hacks mentioned on the show is how you can use Hazel to lock your Mac. David uses the Drafts app on his iPhone to create a document with the name “lock”. When this gets added to a specific folder in Dropbox, Hazel then delete the file (because it’s no longer needed) and runs some Applescript to lock the Mac. Pretty cool right? This is really handy if you walk away from your computer and need to be able to lock it remotely.
This got me thinking, surely there’s a way to do this using a handy Workflow widget? And good news… after playing around, now there is!
Follow the steps below to set up your own remote locking system:
1. Download Workflow and install “Lock Mac”
Download the Workflow iOS app and install the “Lock Mac” workflow I’ve already created.
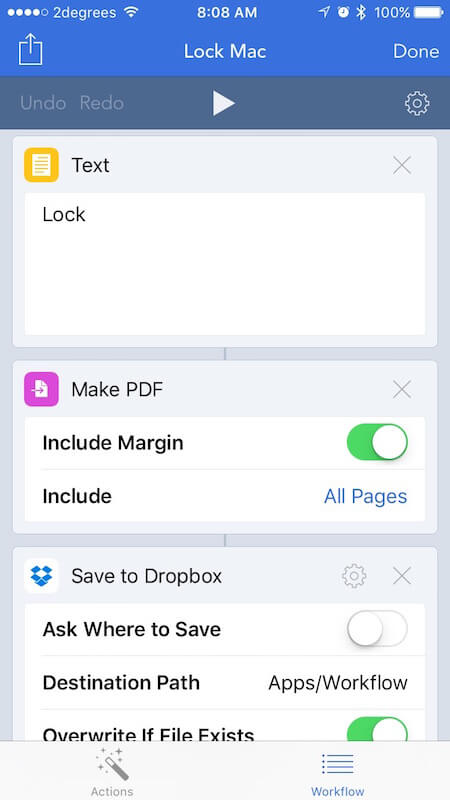
If you want to know how the actual workflow works, here’s a quick rundown:
- The app creates some text with the word “lock”.
- Workflow turns this text into a PDF.
- The PDF is saved to a specific Dropbox folder (I use Dropbox/Apps/Workflow).
- An alert is shown confirming the workflow has run. This isn’t really necessary, but it’s kinda fun.
And that’s it… Now it’s time for Hazel to take over and do the rest.
2. Download Hazel and install “Lock Mac” rules
Now you can head on over to the Hazel website, download Hazel and get her up and running.
 You can either download my Hazel rule here (you may need to edit the target folder) or follow these steps:
- Add a new folder to the list of folders that Hazel will watch.
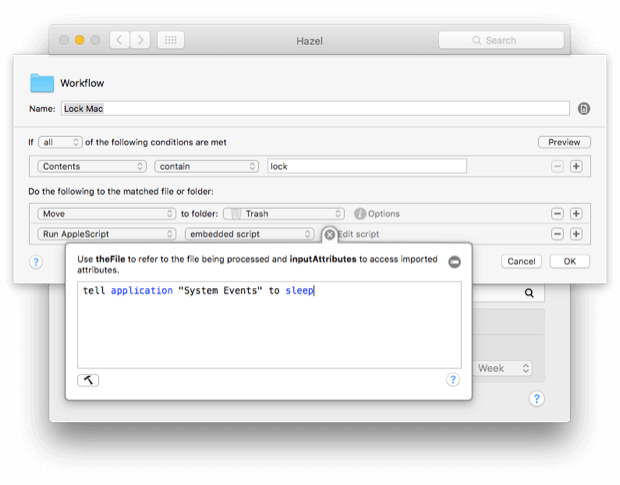
- Add a new rule and set the “Contents” to “contain” the word “lock”. This is the condition that needs to be met for Hazel to lock the Mac.
- Set the actions to “Move” this file to the “Trash” because after locking the Mac, it’s no longer needed.
- Set a section action to “Run Applescript” and “embedded script”. Then click on the “i” and paste in the following Applescript:
tell application "System Events" to sleep - Click “OK” and you’re all done.
Now you can test the entire workflow. Choose the “Lock Mac” option from your iPhone’s Today View. Then watch as a PDF is created, added to the folder, deleted (make sure you have the Apps/Workflow folder open if you want to see this) and your Mac goes to sleep.
To learn more about how I'm using Hazel, check out my getting started video. If you have any cool rules or actions you’d like to share, please let me know in the comments!