This is a blog post I’ve been wanting to write for ages. I’m happy with my task management system. I like the calendar app I’m using. And I know when to use Evernote and when to use Dropbox. But for ages, I’ve been unhappy with my email management system. Despite trying loads of different apps, I couldn’t find a system that works well on desktop and mobile that does everything I need. Now, though, I think I’m finally ready to share the system I’m using for managing email that I’m really happy with.
Update (15/11/16) : My new email client
Since writing this post, I’ve switched away from Sanebox to a new service which I'm super excited to tell you about.
A few months ago, I was approached by my friend, Francesco (who I interviewed on the podcast a while back) who is now working at Newton Mail. Newton is a new email client that evolved out of CloudMagic (which I mentioned below). Full disclosure, Francesco gave me a free Newton account but I'm not being paid to write this and I am sharing my honest feedback on the Newton app.
I started to give Newton a go thinking this would be like every other Mail client – nothing but a bit of shiny packaging and lacking power under the hood. But I was surprisingly mistaken. Newton is not only a beautifully designed app, but it's a packed with useful tools and features, including:
- The ability to snooze emails.
- The option to schedule emails to send in the future.
- Read receipts.
- Integration with Asana, Evernote and Pocket.
- Loads of great keyboard shortcuts.
For this reason, I've decided to pause my Sanebox subscription and I'm now using the Newton mail client on the Mac and iPhone and loving it. I noticed a few minor bugs when getting started and the search on Apple Mail is much faster and returns better results. But overall, I much prefer Newton for quickly sorting through and organising my email.
In this post:
I didn’t want to rush into writing a post and sharing a system that I’m not totally happy with because having the right system is a big deal… right?
Too often, people are getting swamped with email. And why? Surely in this day and age, with so many great tools, apps and extensions at our disposal, it should be easy to manage all that email. But with the number of emails we’re sending on the rise and with a barrage of email apps and tools to choose from, we’re still struggling to keep our heads above water.
In fact, the problem is only due to get worse. A 2015 study1 into email consumption found that there are around 215 emails sent and received per day and this figure is expected to climb 5% a year as the number of email accounts per person and messages received increases.
I’ve been trying to find a better way to manage email for the last few years. And I’ve struggled… I’ve never been able to come up with a system that I’m really happy with. There are some nice email apps out there and even though one app may be really good and a particular thing, it might lack some other basic functionality that I need.
Now, I believe I’ve found a way to manage email that I personally really enjoy using. The beauty of this system is that when I check my email first thing, it’s as if someone has already been into my account and sorted through everything and moved messages into the right folder based on how important it is or what needs to be done. So instead of sorting through email, I can get straight to the business end of my inbox, reply to the important messages, clear the crap and deal with the rest as I see fit.
Email management principles
Before we get into the apps and process I use for managing email, let me run you through some email principles I like to follow. These are the principles I keep in mind when deciding what email app and process to use on the desktop and on the go.
Inbox zero
The term “Inbox Zero” is thrown around a lot these days, and I think people have forgotten where the term actually comes from. In fact, I only found out recently after listening to this episode of the Productivityist podcast, that obtaining inbox zero isn’t about clearing your inbox of email, it’s about clearing your inbox of the unknown. It’s about processing your email so you know what needs to be done with each email and creating zero confusion about the next step that needs to be taken with that email.
As Merlin Mann, the creator of Inbox Zero describers:
“Email is nothing more than a medium. It gets things from one place to another. There’s no reason for you to live in email because that’s not where the action is. Email is great for getting stuff around, but what you don’t want to be focusing entirely on the email itself and exclude the things that are in the email that need to be liberated into other places, like appointments, tasks and reference materials. I believe there is a single place for everything.
The single practice that could change your life today is to process to zero every time you enter your inbox.”
[youtube https://www.youtube.com/watch?v=z9UjeTMb3Yk?rel=0]This is one of the fundamental principles I like to follow, which allows me to keep on top of email. I need to have an efficient and effective way of processing to zero so that I know what needs to be done with that email.
Batching email
The other principle I follow, although this doesn’t really have anything to do with the app you’re using, is to manage your email in batches. So instead of keeping email open all day long, I open it a couple of times a day, process my email, then leave. I may not even reply to anything unless I have the time to reply and enough emails to reply to. If I have the time but only one or two emails, I’ll wait until I have a few more emails to deal with and then reply to all of them in one batch later on.
My email history
Before we get into the details of the system I’m using now, let me tell you more about my journey through the email universe.
It started when I registered my first email address with Yahoo back in 1999…
Okay, just kidding!
For my personal email, I’ve been using Mail.app (Apple Mail) since I purchased my first MacBook back in 2006. I was using a Gmail account back then (this was the pre-iCloud days) and had it sync mail to my Mac via IMAP. When iCloud came around in 2011, I moved my email to the @me.com email address for all my personal mail and I’ve managed my email using the Mail app ever since.
My desktop mail experience has been pretty simple. As for the iPhone, well, I’ve tried a few new mail apps but have never been able to find a good replacement for the default Apple Mail app.
But the Apple Mail app is so basic!
I know, and I’m going to get to that (and the solution), but for now, let me tell you more about the apps I’ve tried in the past.
One of the apps that I really stuck with for a while was Mailbox. Unfortunately, after being acquired by Dropbox, Mailbox now ceases to live. Dropbox had a good crack at trying to make something big with this app, but as far as I know, they struggled to monetise the app and it didn’t really make enough business sense to keep developing it. When Mailbox was announced to the world via its beautiful teaser video, I quickly signed up to the Mailbox beta programme so I could test the app right away. And it was awesome! For a while…
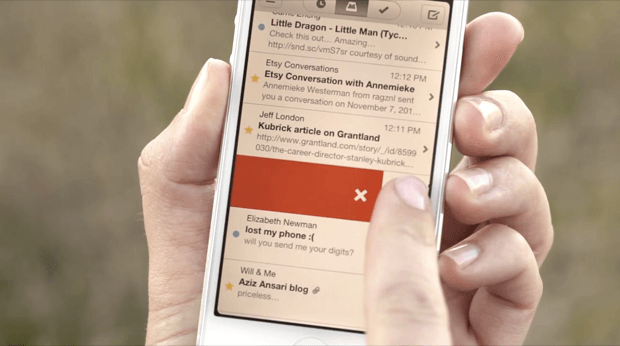
The app is… excuse me… was, really well designed, its simple and easy to use. Mailbox pioneered the swipe to archive/move feature that’s pretty common in most email apps nowadays. When Mailbox launched it was extremely novel to be able to swipe through your mail to quickly archive and move messages around and this made it extremely fast to get through your inbox. Mailbox was one of, if not the first app to introduce snoozing. i.e. the ability to move a message out of your inbox and have it reappear in 2 hours, the next day or next week. However, other apps quickly caught up and added in these swipe and snooze features and Mailbox lost its edge. The downside of Mailbox for me was that it didn’t let me sync my iCloud mailboxes to my account. You were confined to using the “Lists” which did sync to your desktop app, but this didn’t make up for the lack of iCloud mailboxes. They also had a desktop client in beta, but it was pretty buggy and syncing issues made it a pain to use.
So, I moved onto the next app, CloudMagic.
CloudMagic is a great app and its killer feature (in my opinion) are the handy cards that allow you to do various things with your email. For example, integrating Asana or Todoist allows you to quickly create new tasks from right from within your emails. Or you can quickly save links from within your emails using Pocket.
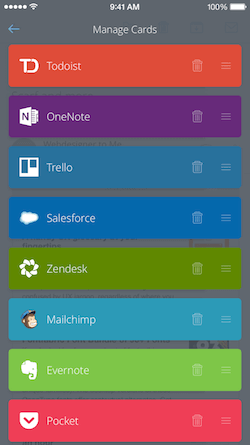

The app is well designed, easy to use and these cards are a real nice bonus. The big let down with CloudMagic is that the iOS app doesn’t support threaded email.
That doesn’t sound so bad…
This is just me, but if I’m trying to keep on top of email, the least an app can do is organise all the messages into a thread instead of having them all listed individually in the inbox.
And that was it… I tried CloudMagic for a while. I gave it a good go. I really did! But the lack of threaded email was too much to bear, and so I defaulted back to using Apple’s stock standard Mail app on the iPhone.
What’s wrong with Apple Mail?
There’s nothing drastically “wrong” with Mail.app, it’s just a bit basic… And maybe that’s why I like it. Because it’s not being dressed up with all these fancy features like snoozing, email tracking, contact info cards and all this other stuff, it works really well, has fast search and it’s never really been an issue.
The one thing I’ve always wished I had was a better way to “triage” and sort my mail. I want to be able to separate emails by:
- Emails I need to reply to.
- Emails I need to read.
- Emails I don’t need any more.
- Emails I need to take some action on.
Where Gmail has the nice “labels” you can apply, Apple is lacking this ability to “tag” your email. One option I tried to solve this problem was MailTags which I have to say, I really liked, and almost purchased. The only let down of MailTags is that it’s desktop only and doesn’t work with Apple’s mobile app. So I would sort all my email, get all organised, and then when I open Mail on my phone, there’s nothing there… no tags, nothing…
The process I was using for a while was Mails built in flags. On the desktop, you can flag mail and better yet, you can rename the flags from “Red”, “Green” and “Blue” to useful names like “To read”, “To reply” or “To do”. But alas, I still hadn’t found my perfect email workflow because the flag colours and names don’t match up with the iOS app. Because the iOS Mail app only supports one colour of flag (orange), I would sort all my mail on the desktop, then when you open it on the phone, all the messages are flagged with the orange flag and there’s differentiation anymore.
My current email workflow
So what is this magic email system I’m using that warrants all this writing?
Sanebox
Over the last month, I’ve been using a very handy service called Sanebox to automatically sort all of my email. As I mentioned before, when you use Sanebox, it’s as if I have a virtual assistant automatically sorting my email so that when I open the Mail app all my mail has been organised into the right place. The beauty of Sanebox is that it works on the server-side, which means it’ll sort through your email in the cloud, so no matter where you access your mail from, either on the desktop or on your phone, Sanebox has already been in to sort everything. This is the killer feature that really sold me on Sanebox and is the reason I’ve adopted it so quickly. I can’t express how convenient it is to have your email automatically sorted for you, no matter what device you’re on.
Sanebox works by analysing your email history to work out what’s important and what’s not. Anything that’s not important gets moved into a separate mailbox called “@Sanelater”, leaving only the important messages in the primary inbox. Learn more here:
[youtube https://www.youtube.com/watch?v=LWQukM0bzZk?rel=0]You can also set up a number of other mailboxes to power up your email. You can simply turn these on from your preferences and Sanebox handles the rest. I have the following mailboxes set up:
- @SaneLater – As I just mentioned, this is where all non-important mail goes. Things like email confirmation messages, notification emails and other automated messages.
- @SaneNews – This is where all newsletter style emails go. I can pretty much view this as my “to read” folder and dive into it when I have some spare time to read some newsletters.
- @SaneTomorrow, @SaneNextWeek and @SaneNextMonth – These are snooze based inboxes. If you don’t want to deal with an email right now, you can move messages into one of these inboxes and they’ll reappear in the primary inbox at the designated time. Sanebox also lets you set up a custom snooze time. So if you want to create a mailbox that snoozes emails for 3 days, you can set this up in the Sanebox preferences.
- @SaneNoReplies – This is another handy mailbox for keeping track of what you need to follow up on. When you send a new email, Sanebox automatically adds it to the @SaneNoReply mailbox so you have a nice handy list of the messages that haven’t been replied to. Naturally, if you receive a reply in your inbox, Sanebox removes the copy from the no reply folder. You can even customise this folder, so a sent item won’t appear in the no reply folder unless a certain amount of time passes e.g. no reply within 2 days. The other handy trick you can use here is if you don’t want an email you’re sending to be added to this folder, you can simply add “FYI” to your subject, and Sanebox knows not to add it to the no replies folder.
- @SaneReminders – As well as the standard snooze folders, you can set up custom reminders. For example, you can send or forward an email and cc: [email protected] to set a custom reminder and Sanebox will make the message reappear on that date. The @SaneReminders folder shows you a list of all the custom reminders you’ve set.
- @SaneReply – This is a custom folder that I’ve setup. I’ve trained… that’s right… trained this folder to move any email here if it’s from one of my readers. For example, replies to my newsletter emails, emails from my websites contact form and blog comments will all be moved here so I have a nice clear list of the emails and messages I need to reply to.
There are a bunch of other Sanebox mailboxes you can add to your account and we’re really just scratching the surface here.
Because Sanebox is so awesome, I reached out to the folks at Sanebox to see if they could support my awesome readers. So, if you sign up to Sanebox by clicking here, you’ll get $10 credit added to your account which can be put towards a paid subscription. Try Sanebox free for 14 days first and see what it can do for your inbox!
So there you have it. Pretty cool right?
What about the action based emails?
I’m glad you asked…
Sending emails to Asana
The other handy tactic I use to clear my inbox is to move all actionable items out of email as quick as I can. Because I use Asana for task management, the easiest way to do this is to forward emails to “[email protected]”. Asana will recognise my email address and create a new task based on the subject line and content of my email. It’ll even attach any files from the email to the task so I have everything I need in one place.
Just recently I was trying to come up with a quicker way of getting emails into Asana. Instead of typing the forward shortcut email and manually typing the “[email protected]” address out (which takes way too long), I wanted to be able to quickly fire off an email with one shortcut.
I setup an Automator workflow and injected some Applescript which automatically creates a new email with the same subject and content as the email I’ve selected. I can then quickly edit the subject to tweak the task name and hit send. The original email is then sent to the archive so I have one less thing to worry about in my inbox.
You can download my handy workflow here.
Your turn
How are you using email? I’d love to hear about your email workflow and any apps you use in the comments below! And of course, be sure to go and check out Sanebox and give it a whirl for free for 14 days.